Thông thường lập trình android sử dụng máy giả lập android đi kèm Android SDK. Tuy nhiên máy giả lập này khởi động lâu và độ phản hồi chậm. Để khắc phục hạn chế trên, sử dụng AndroVM.
AndroVM thực chất là máy ảo chạy trên nền VirtualBox. Thực hiện theo các bước sau:
1) Download and install VirtualBox. This is required in order to install Android (or any other operating system) without damaging your system or messing with BIOS, which can be time-consuming, and/or dangerous to the system..
2) Download AndroVM (click one of the links in this step to download their respective .ova file). For beginners, please choose the version complete with Adobe Flash Player and the Google Play store. If you are an advanced user (or don’t want Google Play as the Android Appstore), you may download the version without the Google Play store.
3) Navigate to the folder where you downloaded either .ova file, and double-click (open) it. You must have VirtualBox installed before opening the file, or it will not open properly. If you have VirtualBox installed, you should see something similar to the picture below:
As pointed out in the picture, you should make sure that the RAM (Random Access Memory) listed is 1/2 or less of the RAM available on your computer. For example, if you have 4 GB of RAM (4096 MB of RAM), the RAM listed in the dialog box should be 2048 MB (2GB) or less. If more than half of the available RAM on your computer is listed in the dialog box, then when you start the Android VM, your host computer (the computer you’re running VirtualBox on) will excessively swap out memory on your hard disk, which will lock up the host computer, and make it unstable.
4) Once you’re sure you have the right settings, click Import.
You may see a “Importing appliance” window, just wait until it finishes.
You should now see a screen like this:
5) You should now recall which version of AndroVM you have downloaded. If you have downloaded the AndroVM version with Flash and Google Play built into it, please skip to step 6, as you do not need to follow step 5. However,if you have downloaded the version without Google Play, please complete this step. As you may (or may not) know, if you want to download Android apps, but you don’t have Google Play, you have to get them from some other source. You can either a) search the Web for an .apk package that contains your app, which may or may not work; b) download another app store that replaces Google Play, and evade the direct .apk web search. Either way, you need to make a modification to Android in order to do this without Google Play, but we will save this for step 6.
Anyway, if you prefer to use the direct .apk search method (not recommended), skip this step, and go to step 6. However, it is recommended that you download an app store, so you may want to continue with this step.
6) Depending on which version of AndroVM you downloaded, you may need to configure your Android device differently. Either way, you should begin the virtual machine by clicking the Start button, as shown below in the yellow box:
You should now see the image below (it will be in color):
At this point, it may be helpful to put the VM in full screen (click View -> Switch to Fullscreen, click “Switch” if you see a dialog box). If you ever want (or need) to pause the VM, click the Machine menu, and then “Pause”. The VM screen will be in grayscale (black and white) if it is paused. To unpause the VM, repeat the steps.
Anyway, the VM screen should show the above image for a few seconds, and then flash into what looks like a command prompt (Linux terminal in this case). You will see a few dialog boxes. Just read them through thoroughly, click “Do not show me this message again” or something similar if you choose to not have them show again, and then click OK. Next, you should see the typical Android logo flashing a few times (see below screenshot).
Please go to step 6a or 6b, depending on which version of AndroVM you have downloaded.
6a) If you downloaded the AndroVM version without Google Play and Flash Player, you will see the following screen (or something similar):
You should know what to do at this point: click and hold the padlock, and move your mouse to the unlocked padlock so that there is a white circle around it, and then let go of the mouse button. Now, you will see the Android home screen:
Do you remember the appstore .apk file we mentioned before? Good, because you need to install it! You need to configure a setting before installation can begin. However, this setting only needs to be configured once. Therefore, if you’ve completed this step already, you need not repeat it.
First, click the circle with 6 dots in in on the right panel. You’ll see a list of apps. Click “Settings”. You should be in the settings panel now. It looks like this:
Scroll down to the “Personal” section, and click the “Security” listing as shown in the picture above.
Next, find “Unknown sources”, and click on it so
it’s checked, as seen below:
You will get a prompt as shown below, read it and click OK.
Next, tap the Home key on your keyboard. This will take you to the Android home screen, which you will need. Click the circle with 6 dots, to get to the app list. Click the Browser app. Now, navigate to Google Drive, SkyDrive, or wherever you stored that file. Open the file in your cloud service from the mobile Android browser and not the host computer’s browser. As soon as you open it, you should see a gray bar at the bottom that reads “Starting download…”. You should see a little download icon in the far left of the top notification bar of Android. The icon is circled in red below.
Next, pull down the notifications bar (click and drag the bar downwards, like in the below pic). When it’s opened, click on the .apk file, as shown in the picture:
If you already have the app installed, you will get a prompt asking if you want to replace the existing app with the one you are attempting to install. Choose OK if this is what you want to do, otherwise choose Cancel if you don’t want to replace the app, and cancel the installation. Unless you clicked Cancel to the prompt described above, you should now see the following screen (or something similar):
Click Install at the prompt to finish the installation. You should now see:
What you do here is at your discretion: you may open the app to see that it installed correctly (choose Open), or you may return to the Android home screen (choose Done, then hit the Home key on your keyboard. Please continue to step 7.
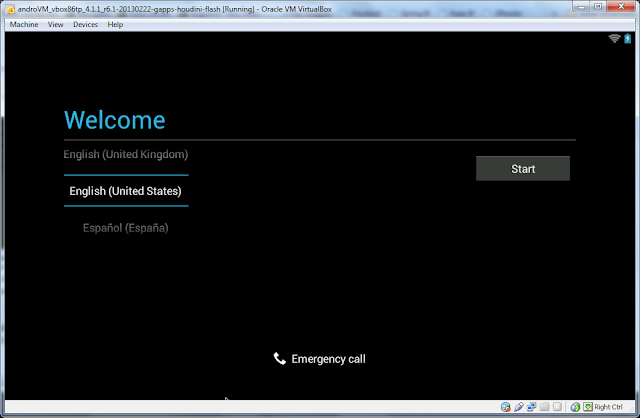
6b) If you downloaded the AndroVM version with Google Play and Flash Player, the Android startup sequence described in step 6 will commence, after which a setup wizard (no, not this wizard! :D) appears, as shown below:
Choose your language from the list below the “Welcome” text, and then “Start” when you’ve chosen your language.
You will now be asked if you have a Google Account (as shown below).
If you use Gmail/Google+/YouTube/Blogger or any of the other Google goodies, select yes.
If you choose no, here’s what you see:
If you choose to sign up for a Google Account (click “Get an account”), you’ll be asked for your name, a Gmail username that you would like, about the same stuff they ask you for when you sign up for one on the Web. Here’s what the setup wizard’s Google Account sign-in screen looks like:
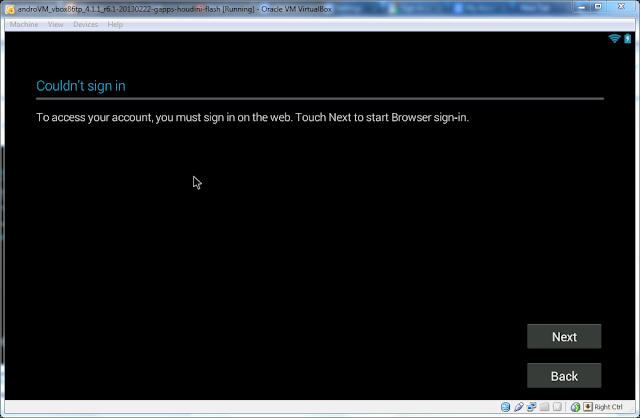
NOTE: If you have two-step authentication enabled for your Google Account, you will be asked to use browser sign-in, as shown below:
When you’ve successfully signed in, you will see the following screen:
It’s recommended that you not enter credit card info into your Android install, because if the install is not secure enough, a hacker (or maybe an inside job?) could use your data to make app purchases in your name without your knowledge.
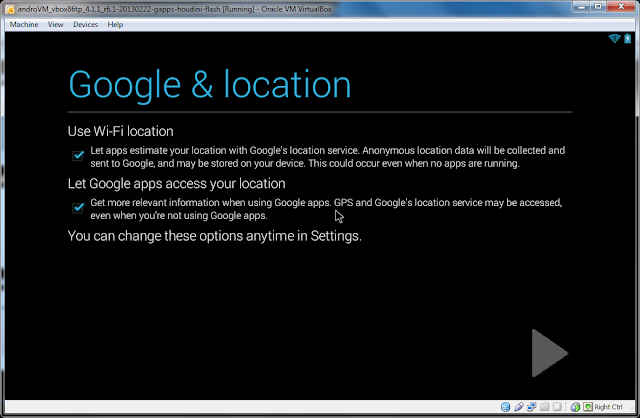
Click “Not now” as circled in the above picture, then you should see something like the below screen:
It’s recommended that you leave at least the second checkbox in this page of the wizard checked, because if something happens to your AndroVM virtual machine, you have the machine’s settings backed up to your Google Account, which you can restore from the Google Account at a later time, should you need to do so. The first checkbox, however, will import the settings from your Google Account into the Android emulator, if any settings in said Google Account exist. When you’re satisfied with the backup settings, click the gray forward arrow in the bottom right corner of the window.
If the first checkbox is checked, Google will contact its servers to import settings to the virtual machine.
Next, you will see the following screen:
The settings explain themselves, and as before, click the arrow when you’re finished with the page.
Next, you will be prompted to set your current time, as shown below.
Click the forward button when you want to proceed. When you do, you will be shown this screen:
Enter your name, then click the forward arrow.
Finally, you will see this:
Click Finish, and you will see the Android Home Screen, with a little tutorial on how to use it.
Proceed to step 7.
7) Congratulations, you now have a working AndroVM emulator successfully configured in VirtualBox. But before we cut you loose to explore on your own, here are a few things to keep in mind that will help you use AndroVM better. You should read the keyboard shortcuts for Android, as they contain a wealth of information that you may need.NOTE: If you want to restart AndroVM (either version), you have to use the Ctrl+Alt+Delete shortcut combo. However, you can not press the key combo into the VM without invoking the function of the combination in the host PC. To send Ctrl+Alt+Delete without invoking the function in the host computer, open the Machine menu in the VM window, and click “Insert Ctrl-Alt-Delete”. Note that this will perform an immediate reboot of AndroVM (and not the host PC), and any unsaved work in the virtual machine will be lost.
Also, and this is very important, the AndroVM version with Google Play and Flash Player has backup capabilities, but the version lacking Google Play does not have the backup feature. This means that if something goes wrong (AndroVM won’t boot, etc.), if you are running the version of AndroVM without Google Play and Adobe Flash Player,you may not be able to backup the settings and apps in AndroVM. However, if you’re running the version with Google Play and Flash, and you have backup enabled, then everything you do will be saved to your Google Account, and restoration of apps and settings will be possible.
And another awesome feature if you have the Google Play version of AndroVM: when you go to the Google Play website, you can queue apps for installation to AndroVM (or any other Android device with Google Play) right on the Play website.
Finally, let’s cover the reset option in Android (which may or may not work, but it can be launched in either version of AndroVM). If you ever break AndroVM (or any Android device, for that matter), there is a way to reset it, which may or may not work. First, open the Android Home Screen (tap the Home key on your keyboard) if you aren’t there already. Next, click the circle with 6 dots. Open Settings, then scroll down until you find the “Backup and Reset” listing, and click on it. Next, look for “Factory data reset”, and click on it. Click the “Reset tablet” button, and finally “Erase everything” if you’re sure you want to reset the VM. Next, restart the VM (see note about Ctrl-Alt-Delete above). If the reset doesn’t work, you will need to delete the virtual machine, and create a new one. Be careful though – this will totally delete every app and setting you have put into the VM, so remember to backup!!
If you’re sure you want to delete the virtual machine and everything in it, follow the steps below.
a) First, close the VM window (if AndroVM is open), or start VirtualBox (if AndroVM is closed, and VirtualBox is not open).
b) In the left list of the VirtualBox window, right-click the name of the virtual machine, and choose “Remove” from the pop-up menu.
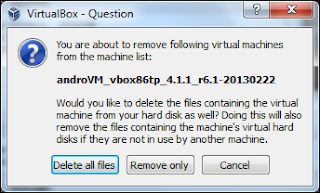
c) You will see the following dialog box:
Choose “Delete all files”, and not “Remove only”, because if you choose “Remove only”, it will only remove the listing of the virtual machine in the machine list in VirtualBox, and not the files associated with it. The option to “Delete all files” will remove the files associated with the virtual machine, as well as the listing in the machine list itself.


 4:22 PM
 Unknown


