Wednesday, April 26, 2017

ODBC Adaptive CDR is not working

  1. nano /etc/asterisk/cdr_adaptive_odbc.conf
    [adaptive_connection]
    connection=asteriskcdrdb
    table=cdr
    alias start => calldate
  2. Modified the /etc/odbc.ini to reflect
    [MySQL-asteriskcdrdb]
    Description=MySQL connection to 'asterisk' database
    driver=MySQL
    server=localhost
    database=asteriskcdrdb
    username=freepbx (user name and password from /etc/freepbx.conf)
    password=fpbx
    Port=3306
    Socket=/var/lib/mysql/mysql.sock
    option=3
  3. module reload res_odbc.so
  4. module reload cdr_adaptive_odbc.so
  5. restart Asterisk
You can run below commands to confirm CDR, MySQL and ODBC connections:
cdr show status
module show cdr
module show mysql
odbc show

Troubleshooting ODBC Module in Asterisk

Introduction

This article is to introduce troubleshooting steps for ODBC malfunction for Asterisk.

Description

We are resolving following error for ODBC Connection.
$ echo "select 1" | isql -v asterisk-connector
[01000][unixODBC][Driver Manager]Can't open lib '/usr/lib64/libmyodbc5.so' : file not found
[ISQL]ERROR: Could not SQLConnect

Methodology

Step # 1

Create a separate directory odbc/ in /usr/lib or /usr/lib64/ (as available):
$ mkdir /usr/lib64/odbc/

Step # 2

Download and Install latest MySQL Connector for ODBC with suitable for your OS:
$ wget http://mysql.mirrors.crysys.hit.bme.hu/Downloads/Connector-ODBC/5.3/mysql-connector-odbc-5.3.6-linux-el6-x86-64bit.tar.gz
$ tar -zxvf mysql-connector-odbc-5.3.4-linux-el6-x86-64bit.tar.gz
$ cd mysql-connector-odbc-5.3.4-linux-el6-x86-64bit
$ ls lib/
libmyodbc5a.so  libmyodbc5S.so  libmyodbc5w.so
$ cp lib/* /usr/lib64/odbc/

Step # 3

Create or Edit file /etc/odbcinst.ini to add following contents:
[MySQL]
Description = ODBC Driver for MySQL
Driver = /usr/lib64/odbc/libmyodbc5w.so
Setup = /usr/lib64/odbc/libmyodbc5S.so
FileUsage = 1

Step # 4

Create or Edit file /etc/odbc.ini with following contents:
[asterisk-connector]
Description           = MySQL connection to 'asterisk' database
Driver                = MySQL
Database              = <database>
Server                = localhost
User                  = <user>
Password              = <password>
Port                  = 3306
Socket                = /var/lib/mysql/mysql.sock

Step # 5

Add following contents in /etc/asterisk/res_odbc.conf:
[asterisk]
enabled => yes
dsn => asterisk-connector
username => <user>
password => <password>
pooling => no
pre-connect => yes

Step # 6

Add your desired function in /etc/asterisk/func_odbc.conf file:
[FULLNAME]
dsn=asterisk
readsql=SELECT fullname FROM users WHERE extension=${ARG1}

Step # 7

Reload func_odbc.so module or restart asterisk:

Step # 8

Verifying OBDC Connection:

Terminal

To check odbc Connection in terimal
$ echo "select 1" | isql -v asterisk-connector
+---------------------------------------+
| Connected!                            |
|                                       |
| sql-statement                         |
| help [tablename]                      |
| quit                                  |
|                                       |
+---------------------------------------+
SQL> select 1
+---------------------+
| 1                   |
+---------------------+
| 1                   |
+---------------------+
SQLRowCount returns 1
1 rows fetched

Asterisk CLI

To check ODBC Connection in Asterisk CLI:
CLI> odbc show
 
ODBC DSN Settings
-----------------
 
  Name:   asterisk
  DSN:    asterisk-connector
    Last connection attempt: 1970-01-01 05:00:00
  Pooled: No
  Connected: Yes
 
CLI> odbc read ODBC_FULLNAME "XXXX" exec
fullname               ABC
Returned 1 row.  Query executed on handle 0 [asterisk]
Share this on

Monday, April 10, 2017

Install Elastix from USB Step by Step

Elastix is one of the best Open Source Unified Communications Servers available today, it is very easy to install but the installer is designed to be run from CDROM and we can make the installation in several devices that don´t have an optical drive.  This document will guide you to modify the installer so you can install entirely from an USB Flash drive.

Warning: The Server Security is a very important and serious aspect in a VoIP server, this guide will not cover that but there is plenty of information on that topic in the Internet. If you are looking for a professional installation contact me and I'll be glad to help you for a very reasonable price.

This guide was created using a PC with an unpartitioned hard disk, if your hard disk is already partitioned, formatted or has data you need to keep, you may need to adjust the settings for your configuration.  You may also lose the data in the disk. I assume no responsibility for data loss or hardware damage, if you decide to follow this guide, you do so at your own risk.

What you need:

Computer with hard drive
2GB or larger USB
Elastix ISO
UNetbootin (to create the bootable USB)

Let's start ...

1. Go to the Elastix Web Site and download the ISO, the stable version right now is 2.4.0, but this guide should work with the beta and alpha versions too (I hope). 


2. Then get UNetbootin to make the USB bootable.

http://unetbootin.sourceforge.net/

3. Format the USB in FAT32.

4. Open UNetbootin,
        1. Select ImageDisc
        2. Click on the ... button and select the elastix iso you downloaded earlier
        3. Select your usb drive
        4 Click OK


UNetbootin will make the USB bootable and will extract the ISO files to the USB.


When UNetbootin finishes extracting just click on Exit, we don't need to reboot.

5. Now let's copy the Elastix ISO to the USB, even though UNetbootin extracted the ISO in the USB we also need the ISO in the USB.  When Anaconda (the linux installer) installs from hard drive it looks for the ISO.

6. We need to modify two files in the USB

Here we need to understand how Linux identifies the different drives we have in the computer, usually the first hard drive is SDA, the second is SDB and so on.  So if you are going to install Elastix to the first hard drive (and the only one) that would be SDA.  For Linux the USB will be another hard drive so it will identify it as SDB if there are no other hard drives in the PC.  If you have 2 hard drives, then the USB would be SDC.

Now that we understand the Linux hard drive naming, let's open the first file we need to modify:

I recommend you to use Notepad++ to modify the files, sometimes windows notepad does not handle Linux files very good. You can get it here: http://notepad-plus-plus.org/ 

Open the file syslinux.cfg with Notepad++, the file is in the root of the USB.

Look for this line, in my file is line 9, but it may change:

append initrd=/ubninit ks=cdrom:/ks_default.cfg ramdisk_size=8192

and change it to:

append initrd=/ubninit ks=hd:sdb1:/ks_default.cfg ramdisk_size=8192

The original line instructs the Linux installer to look for the configuration file in the CDROM, we changed that to make it look for the file in a hard drive (SDB1), the 1 at the end is the partition, sdb1 is the second hard drive's first partition. If you have more than one hard drive you would have to modify the line. As we only have one hard drive (sda) the usb is the second hard drive (sdb),  if you have 2 hard drives then the USB would be the third hard drive (sdc).

That is all for the first file, save it and close it.

Now let's look for the file ks_default.cfg in the USB root and open it with Notepad++

Look for this lines:

#Use CDROM installation media
cdrom


and change it to:

#Use CDROM installation media
#
cdrom


we comment the cdrom line because we are not going to install from cdrom.

Now append this line after the CDROM section

ignoredisk --drives=sdb

This line tells the Linux Installer to ignore the USB as a target for installation, we won't install to the USB we are going to install to the hard drive.

Now look for this line, is right below:

#System bootloader configuration
bootloader --location=mbr 


and change it to:

#System bootloader configuration
bootloader --location=mbr --driveorder=sda,sdb


This change is very important, it tells the Linux installer that the computer boots first from sda (the hard drive), so it installs the bootloader there. If you miss this change, the linux installer will install the bootloader in the USB, so you would only be able to boot Elastix if the USB is connected.

That's it for the second file, save it and close it.

7. We are ready to start the installation.  Plug in the USB drive in the computer and turn it on. As we only have one unpartitioned hard drive, the PC should boot directly from the USB.  If it doesn't, load the computer boot menu and select the USB to boot.

8. You should see the screen below, just hit Enter to continue.


9. Select your installation language and hit enter to continue. 


10. Select the keyboard layout and hit enter to continue.

11. In the next screen select Hard Drive and enter to continue.


12. Now, if you are using the same configuration as me (one unpartitioned hard drive), you should get only one choice here /dev/sdb1 (arrow 1) which is the USB, if your hard drive already have partitions or you have more than one hard drive you will probably get a list here.  You should select the USB, usually it is the last one in the list.

If you copied the Elastix ISO to the USB root just leave the directory blank (arrow 2), if you copied it to a directory, specify it there and the click OK to continue.


13. If your hard disk was unpartitioned you will get a warning that the installer will overwrite all the data, just select yes to continue.


14. Now in the partition type screen, select the first option and make sure the hard drive in which you plan to install Elastix is selected, then select OK to continue.


15. You are going to see another warning about losing all your data in the hard drive, this is the last on, so make sure the data in the hard drive (if any) can be deleted. select Yes to continue.


16. If you want to modify the installer suggested disk layout you can do so in this screen, usually we would not need to change it, so click no to continue.


17.  In the 4 following screens, configure the NIC parameters according to your current network, select YES to continue.


The data in the previous screens is just an example, fill the data with your own network info.


18. Select a Hostname, and fill it in this screen.


19. Now select you current time zone, leave the option "System clock uses UTC" unchecked as some versions of FreePbx don't handle UTC very well.


20.  Select a strong root password and write it down or memorize it, it is not easy to recover it if you lose it.


21. The installer will now format the hard drive and copy all the files needed, this step could take 10 minutes or more depending on the hardware you have.


22.  After the file copy is complete, the computer will reboot, make sure you have the hard drive as the first boot device in the bios.  Elastix should boot from the hard drive and you should see a screen like this.


23. In the first boot Elastix will ask for 2 passwords, first Mysql password, as a regular user, this password is not used very often, but if you are going to need access to the databases to make special applications you will need it, so better write it down.


Then the admin password, this is a very important password, it is the one you will use to enter to the web interface to configure your server, make sure it is a complex password and to write it down.


24. And that's it,  you now have Elastix installed without the need of a CDROM drive !!!.


I hope this guide is useful for you.

Thanks for reading, and leave comments !!!.

Henry.

Instalando Elastix 4 no CentOS 7 64 bits

Este tutorial tem como objetivo fazer a instalação do Elastix 4 no CentOS 7 64 bits
O ambiente utilizado na produção deste tutorial é apresentado a seguir:
  • CentOS 7.2 x86_64 release 1511
  • Elastix 4.0 RC3 versão 64 bits
A instalação do CentOS 7 utilizada para validar esse tutorial foi a Minimal-1511. A ISO dessa versão pode ser baixada através desse link.
Todos os comandos executados nesse tutorial foram executados com o usuário root.

Preparar o sistema operacional para a instalação do Elastix

Antes de iniciar a instalação, precisamos instalar os seguintes pacotes:
  1. # yum install epel-release -y

  2. # yum install wget vim -y
Em seguida, verificamos se existem pacotes a serem atualizados com o comando:
  1. # yum update -y
Reinicie o servidor para subir o kernel atualizado.
  1. # reboot

Fazer o download do Elastix

  1. # cd /tmp

  2. # wget https://sourceforge.net/projects/elastix/files/Elastix%20PBX%20Appliance%20Software/4.0.0/Elastix-4.0.74-Stable-x86_64-bin-10Feb2016.iso/download -O Elastix-4.0-x86_64.iso
Reparem que o arquivo que baixamos é uma ISO. Geralmente, a instalação do Elastix é realizada dando um boot no servidor inicializando através de uma ISO (queimada em um DVD ou inserida em um pendrive).
Como este tutorial está abordando a instalação do Elastix em um sistema já instalado, precisamos montar a ISO em nosso sistema para ter acesso aos arquivos de instalação do Elastix.

Montar a ISO

  1. # mkdir /mnt/iso

  2. # mount -o loop /tmp/Elastix-4.0-x86_64.iso /mnt/iso

Criar repositório local com a ISO montada

  1. # cat > /etc/yum.repos.d/elastix-local.repo <<EOF
  2. [elastix]
  3. name=Repositorio local Elastix
  4. baseurl=file:///mnt/iso/
  5. gpgcheck=0
  6. enabled=1
  7. EOF

Instalar e configurar PHP

  1. # yum install php -y
Definir timezone no PHP antes da instalação do Elastix.
  1. # vim /etc/php.ini
Descomentar a linha date.timezone.
  1. ;date.timezone
E adicionar o local conforme exemplo abaixo:
  1. date.timezone = 'Asia/Ho_Chi_Minh'

 Instalar o Elastix

  1. # yum install asterisk -y

  2. # yum install elastix -y

Desabilitar o SELinux

  1. # sed -i 's/enforcing/disabled/' /etc/selinux/config
Reinicie o servidor.
  1. # reboot
After Reboot Run Command to set mysql and Admin Password.
  1. # elastix-admin-passwords --change

Durante a inicialização, será solicitado a senha do usuário root para o MySQL:
boot
Repetir a senha do usuário root:
boot-1
A próxima etapa solicita a senha para o usuário admin do Elastix:
boot-2
Repetir a senha do usuário admin.
boot-3

Acessar interface web

Abra o seu navegador e digite o IP do servidor.
login
Após o login, a tela inicial do Elastix será exibida.
tela_inicial
Acesse no menu lateral System > Preferences > Language e selecione Português (Brasil).
linguagem
Clique em Save.
O sistema estará pronto para receber a configuração do seu ambiente.

Thursday, March 30, 2017

Top phần mềm xây dựng trang web miễn phí tốt nhất năm 2017

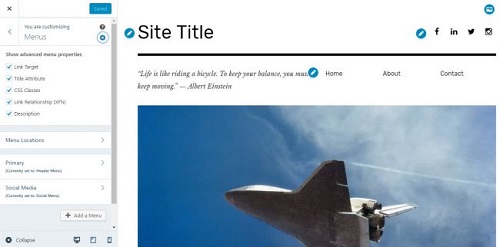
1. Wix
Top phần mềm xây dựng trang web miễn phí tốt nhất năm 2017 - 1
Wix là cách đơn giản nhất để xây dựng trang web của riêng bạn, với các thủ thuật nhanh và trình soạn thảo WYSIWYG thông minh.
Wix cung cấp hai phương pháp để xây dựng trang web. Phương pháp đơn giản nhất là sử dụng công cụ xây dựng trang web Wix ADI (Artificial Design Intelligence). Công cụ này sẽ hướng dẫn bạn qua hàng loạt câu hỏi trước khi tự động tạo trang web cho bạn.
Một phương pháp tiếp cận thực tế hơn, có sẵn nếu bạn quyết định sử dụng trình Wix Editor tiêu chuẩn. Có hàng trăm mẫu phong cách để lựa chọn, bạn có thể tinh chỉnh và điều chỉnh cho phù hợp với nhu cầu của bạn bằng cách sử dụng trình biên tập WYSIWYG.
Wix cung cấp cho bạn một mức độ kiểm soát tuyệt vời đối với giao diện của trang web và vị trí của các công cụ. Bạn cũng có thể sử dụng App Market để thêm các tính năng như bản tin và live chat.
2. WordPress
Top phần mềm xây dựng trang web miễn phí tốt nhất năm 2017 - 2
Có hai phiên bản khác nhau của WordPress. WordPress cho phép bạn tạo trang web của riêng mình trên wordpress.com. Bạn có thể tạo mọi thứ từ trang blog hoặc trang ảnh, đến một cửa hàng trực tuyến. Bạn có thể tạo một trang web tĩnh, hoặc một trang web theo phong cách blog với nội dung cập nhật thường xuyên. Nhược điểm duy nhất là giới hạn các plugin và các mẫu được giới hạn so với trình tạo trang web trên máy tính để bàn.
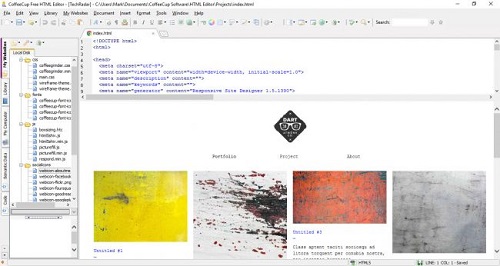
3. CoffeeCup Free HTML Editor
Top phần mềm xây dựng trang web miễn phí tốt nhất năm 2017 - 3
Đây là phần mềm lý tưởng cho việc mã hoá trang web bằng tay, trình chỉnh sửa HTML miễn phí giúp tiết kiệm thời gian.
CoffeeCup Free HTML Editor là một trong những phần mềm xây dựng trang web không có hệ thống quản lý nội dung (CMS). Phần mềm này có khả năng tự hoàn thành mã và sửa lỗi người dùng. Phần mềm có sẵn nhiều chủ đề website dành cho nhiều nhu cầu khác nhau. Trang web sau khi hoàn thành sẽ tương thích với nhiều trình duyệt phổ biến như Internet Explorer, FireFox, Chrome. Tuy nhiên, nhược điểm của phần mềm này là một số tính năng như kiểm tra chính tả và tối ưu hóa mã, chỉ được tích hợp trong phiên bản trả phí của phần mềm.
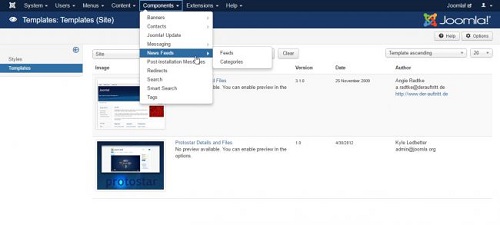
4. Joomla
Top phần mềm xây dựng trang web miễn phí tốt nhất năm 2017 - 4
Một phần mềm xây dựng trang web miễn phí khác là Joomla. Nó có thể không phổ biến như WordPress, nhưng nó cung cấp hai lựa chọn: xây dựng một trang web bằng cách sử dụng các ứng dụng web tại joomla.com và có nó được lưu trữ trên các máy chủ, hoặc tải phần mềm từ joomla.org và lưu trữ nó cho riêng mình.
Nếu bạn chọn tùy chọn thứ hai, bạn sẽ nhận thấy rằng giao diện dễ tiếp cận hơn WordPress. Nó thích hợp cho người mới bắt đầu. Điểm cộng của Joomla là bộ sưu tập khổng lồ các chủ đề và phần mở rộng, cung cấp nhiều lựa chọn tùy chỉnh cách trang web.
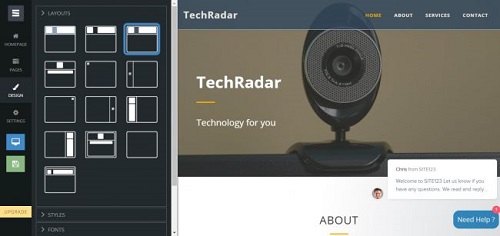
5. SITE123
Top phần mềm xây dựng trang web miễn phí tốt nhất năm 2017 - 5
Như chính tên gọi của nó, ý tưởng của phần mềm SITE123 là tạo trang web đơn giản nhất có thể. Cũng như các phần mềm xây dựng trang web miễn phí trực tuyến khác, bạn bắt đầu bằng cách chọn một định dạng chung - cho dù đó là một blog đơn giản hoặc một cái gì đó phức tạp hơn như một trang web của cửa hàng. Sau khi đã điền vào một vài thông tin cơ bản, bạn sẽ bắt đầu tùy chỉnh nó. Tất cả mọi bước đều được hướng dẫn, chỉ trong vài phút, bạn có thể tạo trang web với số lượng trang không giới hạn, hoàn chỉnh với lưu trữ miễn phí và thậm chí có cả thư viện hình ảnh và biểu tượng miễn phí để sử dụng

Saturday, March 11, 2017

Oracle Recover DB - ORA-01194: file 1 needs more recovery to be consistent

Method 1:
1) Start the database in mount state
SQL> startup mount;
2) Recover the database.
SQL> recover database;
If you come across below error
ORA-00283: recovery session canceled due to errors
ORA-01610: recovery using the BACKUP CONTROLFILE option must be done
 
ORA-01547: warning: RECOVER succeeded but OPEN RESETLOGS would get error below
ORA-01194: file 1 needs more recovery to be consistent
ORA-01110: data file 1: ‘D:\ORACLE\PRODUCT\10.2.0\ORADATA\DBTEST\SYSTEM01.DBF’
then, do the following
1)
SQL> recover database using backup controlfile until cancel;
ORA-00279: change 766152 generated at 03/16/2013 12:12:04 needed for thread 1
ORA-00289: suggestion :
/u01/app/oracle/flash_recovery_area/DUPDB/archivelog/2013_03_16/o1_mf_1_14_%u_.arc
ORA-00280: change 766152 for thread 1 is in sequence #14
Specify log: {<RET>=suggested | filename | AUTO | CANCEL}
/u01/app/oracle/flash_recovery_area/ORCL/archivelog/2013_03_14/o1_mf_1_10_8n43no4v_.arc
ORA-00310: archived log contains sequence 10; sequence 14 required
ORA-00334: archived log:
'/u01/app/oracle/flash_recovery_area/ORCL/archivelog/2013_03_14/o1_mf_1_10_8n43no4v_.arc'
ORA-01547: warning: RECOVER succeeded but OPEN RESETLOGS would get error below
ORA-01195: online backup of file 1 needs more recovery to be consistent
ORA-01110: data file 1:
'/u01/app/oracle/oradata/DUPDB/datafile/o1_mf_system_7qm3ck4o_.dbf'
2)
SQL> recover database using backup controlfile until cancel;
ORA-00279: change 766152 generated at 03/16/2013 12:12:04 needed for thread 1
ORA-00289: suggestion :
/u01/app/oracle/flash_recovery_area/DUPDB/archivelog/2013_03_16/o1_mf_1_14_%u_.arc
ORA-00280: change 766152 for thread 1 is in sequence #14
Specify log: {<RET>=suggested | filename | AUTO | CANCEL}
/u01/app/oracle/flash_recovery_area/ORCL/archivelog/2013_03_14/o1_mf_1_11_8n43qq5j_.arc
ORA-00310: archived log contains sequence 11; sequence 14 required
ORA-00334: archived log:
'/u01/app/oracle/flash_recovery_area/ORCL/archivelog/2013_03_14/o1_mf_1_11_8n43qq5j_.arc'
ORA-01547: warning: RECOVER succeeded but OPEN RESETLOGS would get error below
ORA-01195: online backup of file 1 needs more recovery to be consistent
ORA-01110: data file 1:
'/u01/app/oracle/oradata/DUPDB/datafile/o1_mf_system_7qm3ck4o_.dbf'
3)
SQL> recover database using backup controlfile until cancel;
ORA-00279: change 766152 generated at 03/16/2013 12:12:04 needed for thread 1
ORA-00289: suggestion :
/u01/app/oracle/flash_recovery_area/DUPDB/archivelog/2013_03_16/o1_mf_1_14_%u_.arc
ORA-00280: change 766152 for thread 1 is in sequence #14
Specify log: {<RET>=suggested | filename | AUTO | CANCEL}
/u01/app/oracle/flash_recovery_area/ORCL/archivelog/2013_03_16/o1_mf_1_14_8n875owh_.arc
ORA-00279: change 769526 generated at 03/16/2013 12:48:13 needed for thread 1
ORA-00289: suggestion :
/u01/app/oracle/flash_recovery_area/DUPDB/archivelog/2013_03_16/o1_mf_1_15_%u_.arc
ORA-00280: change 769526 for thread 1 is in sequence #15
ORA-00278: log file
'/u01/app/oracle/flash_recovery_area/ORCL/archivelog/2013_03_16/o1_mf_1_14_8n875
owh_.arc' no longer needed for this recovery
Specify log: {<RET>=suggested | filename | AUTO | CANCEL}
cancel
Media recovery cancelled.
3) Open the database in resetlog mode
SQL> alter database open resetlogs;
4) Check the status
SQL> select instance_name, status from v$instance;
INSTANCE_NAME    STATUS
------------------------   -------------
DUPDB                  OPEN
SQL> select name, open_mode from v$database;
NAME      OPEN_MODE
----------    ------------------
DUPDB     READ WRITE


Method 2:
SQL> shutdown immediate
ORA-01109: database not open
Database dismounted.
ORACLE instance shut down.
SQL> startup mount
ORACLE instance started.
Total System Global Area  530288640 bytes
Fixed Size                  2131120 bytes
Variable Size             310381392 bytes
Database Buffers          209715200 bytes
Redo Buffers                8060928 bytes
Database mounted.
SQL> ALTER SYSTEM SET "_allow_resetlogs_corruption"= TRUE SCOPE = SPFILE;
SQL> ALTER SYSTEM SET undo_management=MANUAL SCOPE = SPFILE;
SQL> shutdown immediate
ORA-01109: database not open
Database dismounted.
ORACLE instance shut down.
SQL> startup mount
ORACLE instance started.
Total System Global Area  530288640 bytes
Fixed Size                  2131120 bytes
Variable Size             310381392 bytes
Database Buffers          209715200 bytes
Redo Buffers                8060928 bytes
Database mounted.
SQL> alter database open resetlogs;
Database altered.
SQL> CREATE UNDO TABLESPACE undo1 datafile '<ora_data_path>undo1_1.dbf' size 200m autoextend on maxsize unlimited;
Tablespace created.
SQL> ALTER SYSTEM SET undo_tablespace = undo1 SCOPE=spfile;
System altered.
SQL> alter system set undo_management=auto scope=spfile;
System altered.
SQL> shutdown immediate
SQL> startup

Tuesday, March 7, 2017

win 10 explorer cannot search

If that does not work for you, run the built-in search troubleshooter to find out more about it. To run it, do the following:
  1. Tap on the Windows-key, type Control Panel and hit enter.
  2. Alternatively, use the keyboard shortcut Windows-Pause to open the Control Panel if the above does not work. Click on "Control Panel Home" when the window opens.
  3. Select large or small icons under "view by".
  4. Click on Indexing options, and when the menu opens on the Advanced button.
  5. There you need to click on "troubleshoot search and indexing", and follow the instructions 

Twitter Delicious Facebook Digg Stumbleupon Favorites More

 
Design by Free WordPress Themes | Bloggerized by Lasantha - Premium Blogger Themes | Powerade Coupons